Wrapping Your Horse’s Legs Safely – Key Takeaways
- Wrapping Your Horse’s Legs Safely protects your horse from injuries and swelling.
- Always clean and dry the leg before wrapping.
- Use the right wrap type and apply even pressure.
- Follow step-by-step wrapping techniques for safety.
- Check wraps regularly to avoid tightness or slippage.
- Here is a quick Horse leg Wrap Step by Step Guide:
Gather all necessary supplies: clean leg wraps, padding if needed, and scissors. Ensure wraps are free of dirt and damage.

Use a damp cloth to wipe down the legs. Removing dirt and debris prevents irritation under the wraps.
Place padding around sensitive areas like the cannon bone and tendons to provide extra cushioning.
Begin at the back of the leg, wrapping firmly but gently, moving downward with even tension to avoid pressure points.
Use the Velcro or fasteners to secure the wraps without cutting off circulation. Make sure the wrap doesn’t slip.
Check for tightness by sliding a finger under the wrap. It should be snug but not restrictive.
Regularly inspect the wraps during riding or turnout for signs of slipping or discomfort and adjust as necessary.
After use, carefully remove wraps and clean them according to manufacturer guidelines to maintain hygiene and longevity.
Step 1:Wrapping Your Horse’s Legs Safely – Choose the Right Wrap for Your Horse’s Needs
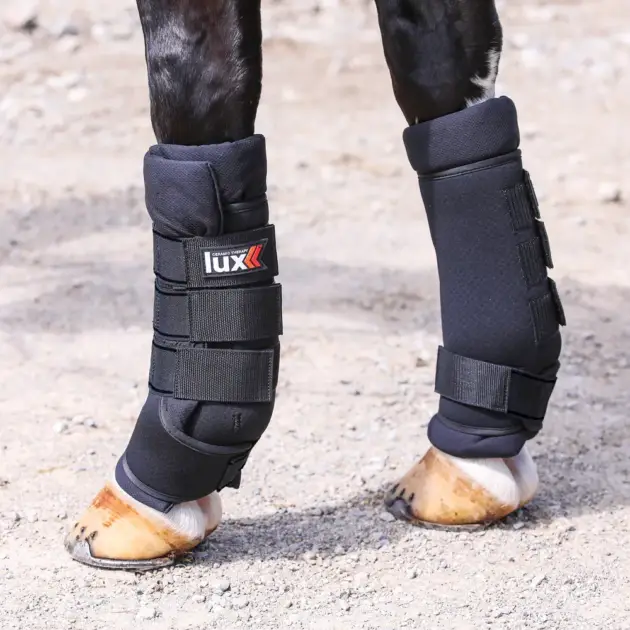
Selecting the correct leg wrap is crucial for safe and effective protection. For therapy and recovery, the Lux Ceramic Therapy® Quick Wraps are excellent choices. These wraps promote circulation and healing through ceramic-infused fabric.
If you need wraps for daily support during exercise, the Dura-Tech® 16oz Deluxe Polo Wraps provide durable, breathable protection with just the right compression. Choosing the right wrap material helps prevent injuries and ensures comfort.
Step 2: Prepare Your Horse’s Legs
Before wrapping, ensure your horse’s legs are clean and dry. Dirt or moisture trapped under wraps can cause irritation or infections. Use a soft cloth or brush to wipe the legs, removing any debris. Proper prep is essential for preventing skin problems and ensuring wraps stay in place.
For added protection, consider using Co-Flex Bandage Wrap as a base layer. Its adhesive properties help secure the wrap without restricting movement.
Step 3: Understand the Wrapping Direction and Pressure
When wrapping, always move from the back of the leg forward and upwards. Begin below the knee or hock and wrap around in a figure-eight pattern to provide stable coverage without cutting off circulation.
Keep the pressure firm but gentle. Uneven tension can cause swelling or restrict blood flow. It’s common for new riders to wrap too tight or too loose—practice helps get this right. If in doubt, ask a vet or trainer for guidance.
Step 4: Start Wrapping – Step-by-Step Technique
- Anchor the wrap at the back of the cannon bone just above the fetlock.
- Wrap downwards around the fetlock, crossing under the leg.
- Move the wrap diagonally across the front of the leg in a figure-eight, ensuring full coverage.
- Continue wrapping upwards toward the knee or hock.
- Secure the wrap with the Velcro or adhesive strip.
Follow this method to avoid common mistakes like loose ends or uneven pressure.
Step 5: Check Fit and Comfort
Once wrapped, check for tightness by sliding two fingers under the wrap. You should feel snugness but no pinching or excessive tightness. Watch your horse for signs of discomfort or limping after wrapping.
If you notice swelling, loosen the wrap immediately. It’s essential to check wraps regularly, especially after riding or turnout.
Step 6: Remove Wraps Carefully
Never leave wraps on longer than recommended by your vet or manufacturer instructions. Remove wraps gently to avoid pulling hair or causing skin irritation. Clean wraps regularly to maintain hygiene and prolong their life.
If you’re using Dura-Tech® Tekno-Dri® No Bow Leg Wraps, their moisture-wicking fabric helps reduce odor and bacteria buildup, making them easier to maintain.
Step 7: Store and Maintain Your Wraps
Store your wraps in a clean, dry place away from dirt and moisture. Regular washing according to product care instructions will keep them soft and functional. Proper care extends the lifespan of your wraps and ensures they perform well every time you use them.
Step 8: When to Use Leg Wraps
Use leg wraps during exercise, turnout, transport, or recovery from injury. Not every situation requires wraps, so consult with your vet or trainer to decide the best times and types for your horse.
For injury recovery, wraps like the Dura-Tech® Quick Wrap No Bow Leg Wraps are designed to protect and support healing tendons and ligaments.
Wrapping Your Horse’s Legs Safely – A Step By Step Summary
Gather all necessary supplies: clean leg wraps, padding if needed, and scissors. Ensure wraps are free of dirt and damage.
Use a damp cloth to wipe down the legs. Removing dirt and debris prevents irritation under the wraps.
Place padding around sensitive areas like the cannon bone and tendons to provide extra cushioning.
Begin at the back of the leg, wrapping firmly but gently, moving downward with even tension to avoid pressure points.
Use the Velcro or fasteners to secure the wraps without cutting off circulation. Make sure the wrap doesn’t slip.
Check for tightness by sliding a finger under the wrap. It should be snug but not restrictive.
Regularly inspect the wraps during riding or turnout for signs of slipping or discomfort and adjust as necessary.
After use, carefully remove wraps and clean them according to manufacturer guidelines to maintain hygiene and longevity.
Wrapping Your Horse’s Legs Safely – Frequently Asked Questions
Q1: How tight should horse leg wraps be?
A: Wraps should be snug but not tight enough to cause discomfort or restrict blood flow. Two fingers should slide under comfortably.
Q2: Can I leave leg wraps on overnight?
A: Generally, no. Overnight wrapping should only be done under veterinary guidance. Prolonged wrapping can cause skin problems.
Q3: How often should I clean leg wraps?
A: Clean wraps after every use to prevent dirt and bacteria buildup, especially if your horse sweats a lot.
Q4: What’s the difference between polo wraps and therapy wraps?
A: Polo wraps provide support during exercise; therapy wraps promote healing and reduce inflammation after injury.
Q5: Can leg wraps prevent all injuries?
A: No wrap can guarantee injury prevention, but they reduce risk by providing support and protection during activity.
For more info on leg wraps and protection, visit the horse boots and leg wraps category.
External safety info: Check product safety details at California Prop 65 Warnings.